


I think, therefore I am
Rene Descartes
Table of Contents
- What is Django?
- Why should you use Django?
- Websites that rely on Django
- History of Django
- Prerequisites
- Virtual Environment
- Django: creating a project
- Django: creating an app
- Resources for further studies
- Conclusion
- Article Sources
What is Django?
According to the official documentation, "Django is a high-level Python Web framework that encourages rapid development and clean, pragmatic design. Built by experienced developers, it takes care of much of the hassle of Web development, so you can focus on writing your app without needing to reinvent the wheel."
Django is free and open source. On top of that, it is ridiculously fast, reassuringly secure, fully loaded, Incredibly versatile, and exceedingly scalable.
In this article, you will learn how to install Django, how to set up a virtual environment, how to start a Django project, and how to create a Django app. You will also find important resources from where you can learn the advanced topics of Django.
But before that, let us know the reasons for using Django and also some history behind the creation of Django.
Why should you use Django?
If you even have a couple of the following requirements, Django is probably a suitable fit for your project.
- Take advantage of a dependable framework that is being developed and used by many of the world's most well-known websites and businesses.
- You must move quickly, deploy quickly, and make modifications as you go.
- Backend development for a web app or API.
- If you get stuck, you're worried about finding a solution, thus comprehensive documentation and a helpful community should be available.
- The app may scale up or down at any time.
- The app must be safe from common vulnerabilities and attacks such as CSRF, SQL Injection, XSS, Clickjacking, and so on.
- Incorporate cutting-edge technology, such as Machine Learning, in the future.
- Need ORM support since you may not want to work with database queries directly.
- Open-source software is required.
In addition to the aforementioned factors, the skill set of your team should be considered. Working with Django will be quite painless if you're already a web developer who understands "how the web works." You only need to grasp how Django is structured and how it works to get started.
Websites that rely on Django
Django has been around for over a decade. Several well-known websites have used it in their production throughout this time, including:
- Youtube
- Dropbox
- Spotify
- Mozilla
- Bitbucket
- Udemy
- Disqus
- The Washington Post
- NASA
- National Geographic
- The Guardian
- JSFiddle
- The Onion
Are you still debating whether it'll be worthwhile to devote your valuable time to learn Django?
History of Django
Django was created in the fall of 2003, when the web programmers at the Lawrence Journal-World newspaper, Adrian Holovaty and Simon Willison, began using Python to construct apps. In July 2005, it was made available to the public under a BSD license. The framework was named after guitarist Django Reinhardt. Adrian Holovaty is a Romani jazz guitar player and a big fan of Django Reinhardt.
In June 2008, it was announced that a newly formed Django Software Foundation (DSF) would maintain Django in the future.
Ok, enough talking about history. But please note that Django was initially created for managing tasks of a newspaper organization. And it is a matter of fact that Django's documentation is well-written and it is easy to understand for absolute beginners. Every part of the documentation has been connected carefully. So, I will highly appreciate reading the Django official documentation.
Prerequisites
In this article, I will do my best to explain every step of the procedure in detail. However, if you have any Python expertise and are familiar with some fundamental command-line commands, you will be in good shape. Please familiarize yourself with the following commands if you've never used the command line before: cd, ls, rm, and mkdir.
We will be using Python 3.9 and Django 3.2 in this article. So, if you want to follow along with this article, please make sure you have Python 3.9 installed on your device.
Virtual Environment
Using a virtual environment for your Django projects is a must. It becomes very handy when we need to host the Django project on different hosting services providing platforms like Heroku, PythonAnywhere, AWS, DigitalOcean, etc.
It’s common practice to use a virtual environment for your Python projects to create self-contained development environments (also called “sandboxes”). The goal of the virtual environment is to prevent different versions of libraries/packages from messing with each other.
Think of a virtual environment as a completely isolated container within your computer, where you can utilize any version of Python and install libraries/packages and it won’t affect anything outside that container.
We will be using virtualenv in this article as it is super easy to use. So for using virtualenv, we need to first install it using pip in the command shell. We need to run this command (Note: internet connection must be turned on)
~$ pip install virtualenv
After installing virtualenv, we need to create a virtual environment for our project. We can easily do that by running this command.
~$ virtualenv venv
Here venv is nothing but the directory name for our virtual environment. You can name it anything you want like ‘sandbox’, ‘bubble’, ‘my_env’, etc. In this venv directory, we have some more directories. Among them, the most important is ‘Scripts’ as it contains the ‘activate’ file which will allow us to activate our virtual environment. So, for activating our virtual environment, we need to run this command.
~$ venv/Scripts/activate
Once the virtual environment is activated, the name of your virtual environment will appear on the left side of the command shell. This will let us know that the virtual environment is currently active. If you want to deactivate the virtualenv, we just need to run this command:
~$ deactivate
Please don’t run the deactivate command now as we need to work on our Django project. By the way, congrats! Now you know how to successfully set up a virtual environment in Python. But our mission isn’t done yet.
Django: creating a project
For creating a Django project, we need to install Django on our device first. We can do that using pip. Please make sure the virtual environment is activated. After that, run this command:
~$ pip install django
After the installation of Django, we need to create our first project. We will name that project ‘basicpro’ for the purpose of this article. You can name it anything you want. So, for creating this ‘basicpro’ project, we need to run this command:
~$ django-admin startproject 'basicpro'
We have successfully created our first Django project, we can see that we have a new directory called ‘basicpro’. Before looking into what’s inside of this project directory, we need to create a requirements.txt file in the basicpro directory (From now on, we will mention this ‘basicpro’ directory as the root directory. So don’t get confused). For creating the requirements.txt file, we need to run this command.
~$ pip freeze > 'basicpro/requirements.txt'
Please note that, if we want to use any other third-party libraries in our Django project, we must run the previous command to add the new library in the requirements.txt file after installing that library with pip.
Note that, Each Django project is a Python package so you will find a lot of similarities if you are familiar with Python packages. Ok, now let us check our root directory and talk about the pre-built files and directories which is already created for us by Django. Our project structure should look like this:

These files are:
- The outer basicpro/ root directory is a container for your project. Its name doesn’t matter to Django; you can rename it to anything you like.
- manage.py: A command-line utility that lets you interact with this Django project in various ways. We will use this file in our command shell to interact with our Django project.
- The inner basicpro/ directory is the actual Python package for your project that you will need to use to import anything inside it (e.g. basicpro.urls). Once the project has been created, You can’t rename it.
- basicpro/init.py: An empty file that tells Python that this directory should be considered a Python package. If you’re a Python beginner, read more about packages in the official Python docs.
- basicpro/settings.py: Configurations for this Django project. Django settings will tell you all about how this project will work. We will change the settings and add new settings in this file throughout the entire development process.
- basicpro/urls.py: The URL declarations for this Django project; a “table of contents” of your Django-powered site.
- basicpro/asgi.py: An entry-point for ASGI-compatible web servers to serve your project. This is used for deploying our project to a production server.
- basicpro/wsgi.py: An entry-point for WSGI-compatible web servers to serve your project. This is also used for deploying our project to a production server.
- requirements.txt: A text file containing all the dependencies of the Django project. We will find Python third-party libraries/packages and their version numbers in this file.
We don’t need to care much about the basicpro/init.py, the basicpro/asgi.py, and the basicpro/wsgi.py file for this article's purpose. We only need to work on the manage.py, the settings.py, the urls.py, and the requirements.txt file.
Now that we have created our Django project, let’s verify if our Django project works or not. We need to check in the root directory if we haven’t already, then we need to run this command in the shell:
~$ python manage.py runserver
We will see the following output on the command line:

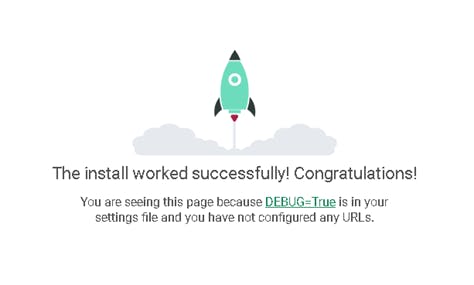
Congrats! Now you know how to create a Django project from scratch successfully and you understand the use cases of different files in a Django project. You have also started the Django development server, a lightweight Web server written purely in Python.
Now that the server’s running, visit https://127.0.0.1:8000/ with your Web browser. You’ll see a “Congratulations!” page, with a rocket taking off. It worked!
But wait, we are not done yet. Yes, we have created a project, but right now it’s empty. The main goal of Django is to help us create websites. So how can we create a website with this project? For that, we need to read the next section of this article.
Django: creating an app
For creating actual websites, I mean for showing something on the browser, we need to create Django apps. What’s the difference between a project and an app?
An app is a Web application that does something – e.g., a Weblog system, a database of public records or a small poll app. A project is a collection of configuration and apps for a particular website. A project can contain multiple apps.
Django Apps are simple to incorporate into Django projects and they are easily pluggable. It implies that a single app can be used in various projects. Without any complications, we can copy a Django app from one project to another. Only a few variables in the settings.py file need to be updated.
Reusability is the way of life in Python and Django has grown quite reusable in terms of app look. This is one of the most compelling reasons to choose Django projects for your website's backend. If your websites (must) use similar services such as authentication, blogging, e-commerce, analytics, and databases, you can utilize apps for these services and include one app in every Django project.
Ok, now that you know what are Django apps, let’s create our very first Django app. We will call it ‘helloworld’. Run this command for creating the app:
~$ python manage.py startapp helloworld
You will see a new directory has been added in the root directory and its name is helloworld, this is our Django app. And now, our project structure should look like this:
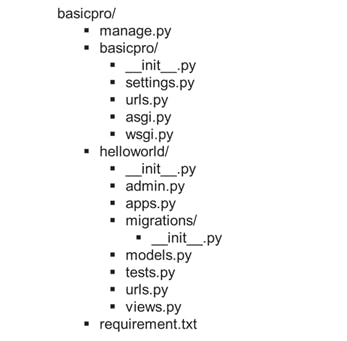
If there is a urls.py file in the helloworld directory, then it’s great. But, in the latest versions of Django, this file is not created by default. So, if it’s not there we need to add the urls.py file by ourselves.
We can see that each Django application is made up of a Python package that follows a set of rules. Django includes a function that produces the app's basic directory structure automatically, allowing us to focus on writing code rather than building directories.
Though we have created this hello world app, Django won’t recognize this as an app for our basicpro project. That’s where the basicpro/settings.py file comes in handy. In that file, we will find a list called ‘INSTALLED_APPS’. It contains some default apps, we need to add the ‘helloworld’ app at the end of the list. Now, this list will look something like this:
INSTALLED_APPS = [
    'helloworld',
    'django.contrib.admin',
    'django.contrib.auth',
    'django.contrib.contenttypes',
    'django.contrib.sessions',
    'django.contrib.messages',
    'django.contrib.staticfiles',
]
Now that our app is ready and recognized by Django, we need to select an URL to display our message on the browser. That’s why we need to use the basicpro/urls.py and the helloworld/urls.py files.
In the basicpro/urls.py file, we need to mention that all the URLs which are related to the helloworld app, will be found in the helloworld/urls.py file. By doing this we can handle our application more specifically and cleanly. So, for that, we need to import the include() function from django.urls in the basicpro/urls.py file and insert an include() in the ‘urlpatterns’ list. After that, our basicpro/urls.py file will look like something like this,
from django.contrib import admin
from django.urls import include, path

urlpatterns = [
    path('admin/', admin.site.urls),
    path('', include('helloworld.urls'))
]
Here the path() function is actually setting up the URL paths. We can pass four arguments in this function, two required: route and view, and two optional: kwargs, and name.
route is a string that contains a URL pattern. In the last picture, we have used ‘ ’ (empty string) as the route argument. It means the URL route will be the root URL of the application. So if our website URL is ‘mysite.com’, then we will find our contents in the root URL (mysite.com). If we used ‘helloworld’ as the route argument, then we need to visit mysite.com/helloworld to see the site content.
When Django finds a matching pattern’s route, it calls the specified view function. In the last picture, we haven’t used a view function. Instead, we have used include() and told Django, “Please go to the helloworld/urls.py file and there you will find your specific view function’s name”.
I hope now you understand how these URLs patterns work, but we haven’t added a view function with our URL yet. We will do that in the helloworld/urls.py file. A view function is a function that takes an HttpRequest as an argument and in return, they either render an HTML template, redirect to another page, or shows an HttpResponse.
Before creating our view function, let us add it to our helloworld/urls.py file. After adding the function the file will look something like that:
from django.urls import path
from helloworld import views

app_name = 'helloworld'
urlpatterns = [
    path('', views.index, name='index')
]
Here we need to import the path() function and views module as they are important in later tasks. We have added a new path in the urlpatterns list. This also has an empty route, but its view function is views.index. We have also set a name for the view function as the third argument of the path() function. And you can also see a new app_name variable added to the script.
Naming the app and the view functions aren’t mandatory but it’s a good practice and will help us a lot when we will develop this application further.
Now Django knows which function it needs to run when someone will visit our site. But wait a minute! We have forgotten to do the main task and it is creating the view function itself.
For doing that we need to go to the helloworld/views.py file and add an index() function which is our desired view function. After adding the function our file will look something like that:
from django.shortcuts import render
from django.http import HttpResponse

# Create your views here.
def index(request):
    return HttpResponse("Hello World")
Here the render() function is imported by default, it is used to render HTML templates. But we aren’t going to talk about that in this article. We have imported HttpResponse() function from the django.http module.
After that, we have created the index() function which takes an HttpRequest (request) as an argument. If we don’t use the HttpRequest as an argument in our view function, the entire system will break.
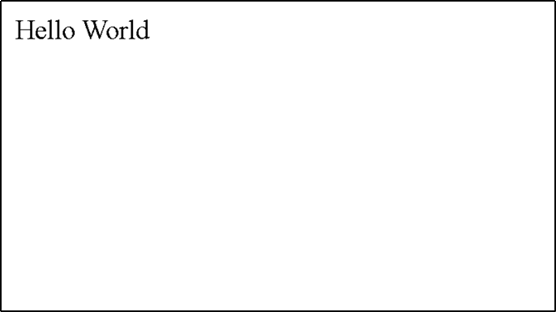
And finally, you can see that we have returned an HttpResponse and it takes only one argument and that is the response itself. We have passed “Hello World” meaning we want to display Hello World in our browser.
Now, after completing all those steps, we have successfully created a very small hello world website. But how can we see it on the browser?
Do you remember that we have used the runserver command in the shell at the very beginning of this article to verify if our Django project works or not? We need to do the same thing now. Let’s run this command:
~$ python manage.py runserver
Now if we visit https://127.0.0.1:8000/ with your Web browser, we will see a page like this page,
Resources for further studies
You might have guessed already the main reason behind writing this article. I haven’t wanted to tell you how to build a full-fledged blogging site or todo app using Django. I think you will find many good resources and content on the internet about those applications. Besides, Django documentation does a great job of explaining every ins and outs of this popular framework. In fact, during the entire writing process, I was always tensed about how could I write this topic more descriptively than Django docs so that it will be easier for learners.
My mission was to tell you why you should consider Django for creating your web applications and I just wanted to show you how easy it is to work with this framework. Now, folks, you will decide if I am successful in this mission or not.
If you have come to the end of this article, kudos to you. Now you have a very basic knowledge about Django. But this is not the place where you will stop. This is just the beginning. There are a lot of things you need to learn about Django. You need to learn about models, SQL, forms, templates, template tags, authentication, static files, admin site, migrations, REST API, deployment, and many more.
Here are some of the best resources which might help you in your Django learning journey:
- Django Official Documentations
- freeCodeCamp’s Django 3 full course
- Corey Schafer Django tutorials playlist
- Udemy Python & Django Full Stack Web Developer Bootcamp
- freeCodeCamp’s other Django related videos
Conclusion
If you have enjoyed my writing and want to keep me motivated, consider leaving starts on GitHub, endorse me for relevant skills on LinkedIn, and follow me on Twitter. You can always hit me with direct messages.
In the end, please consider sharing this article with your friends/teammates who will find this helpful as well. Stay safe and keep learning :)